
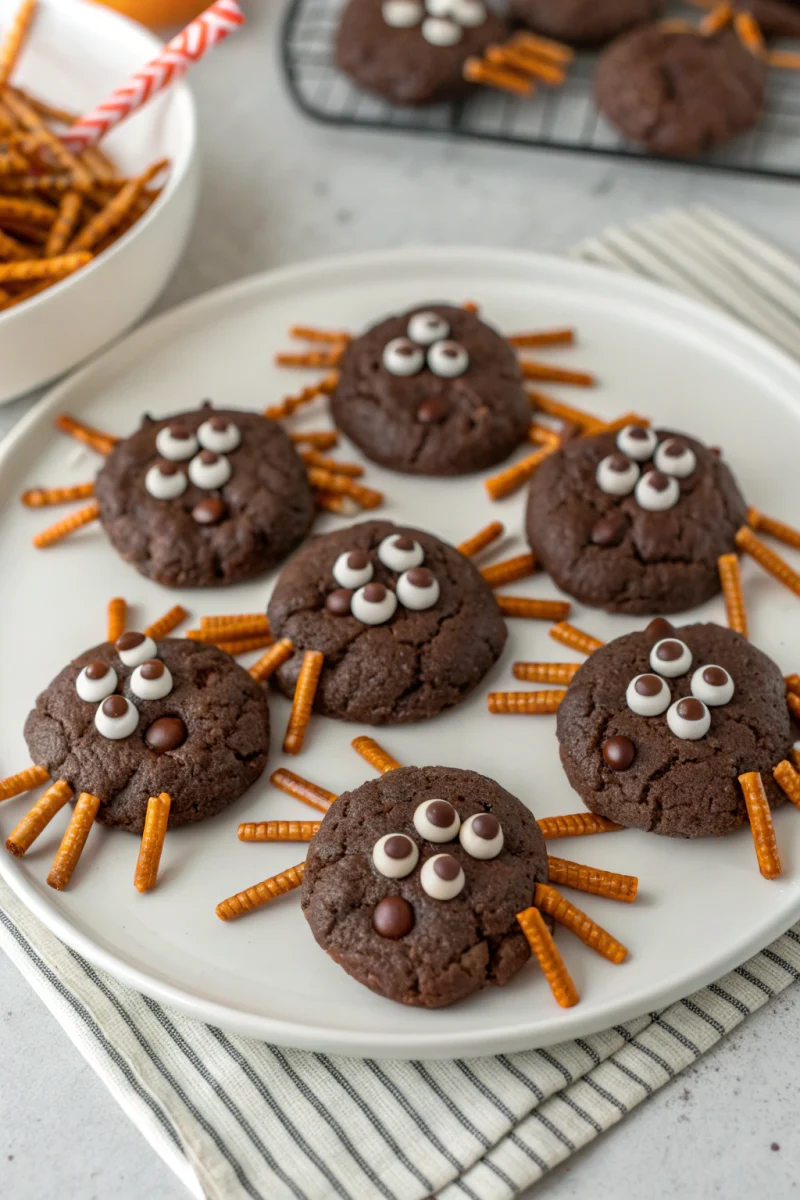
Spooktacular Spider Cookies: The Easiest No-Bake Halloween Treat Ever
Oh, these little guys? They’re my secret weapon for Halloween. Every year, I swear I’ll try something fancy—maybe carve a pumpkin or make a haunted gingerbread house—but then I remember these spider cookies. They’re *so* simple, even my 5-year-old niece can help (and she *loves* sticking the pretzel legs in). The first time I made them, I was racing against the clock before a classroom party, and let’s just say… they saved my sanity. Now? They’re a non-negotiable part of our Halloween tradition.
And the best part? No oven required. Just a little melting, a little assembling, and *boom*—you’ve got a plate of creepy-cute spiders that’ll make the kids shriek with delight. (The good kind of shriek, not the “why is there a real spider in the kitchen?!” kind.)
—
Why These Spider Cookies Are a Halloween Game-Changer
Look, I get it. Halloween baking can be *a lot*. There’s the pressure to make something Pinterest-worthy, the sugar rush aftermath, and the inevitable mess of sprinkles ground into your kitchen floor. But these spider cookies? They’re the opposite of stressful. They’re fast, they’re fun, and they’re *delicious*—like, even-the-picky-kids-will-eat-them delicious.
I learned this trick from my friend Sarah, who’s a preschool teacher. She makes these every year for her class, and the kids go nuts. One year, a little boy named Max took one bite, gasped, and said, “Miss Sarah, this spider is *alive*!” (It was not. But I love the enthusiasm.)
The magic here is in the texture combo: the crunch of the pretzel legs, the smooth melt of the chocolate, and the chewy sweetness of the cookies. It’s like a deconstructed cookie dough truffle, but way cuter. And because they’re no-bake, you can make a *ton* of them in under 30 minutes. Trust me, you’ll want extras. They disappear fast.
—
The Secret to Perfect Spider Cookies (Spoiler: It’s Easier Than You Think)
Okay, let’s talk science for a second—but don’t worry, it’s the *fun* kind. The key to these spiders looking (and tasting) amazing is all about the chocolate. You want it melted *just* enough to be smooth and glossy, but not so hot that it turns grainy or burns. Here’s how I do it:
1. **Low and slow is your friend.** I microwave the chocolate in 15-second bursts, stirring in between. It takes a little patience, but it’s worth it. The first time I made these, I nuked the chocolate for a full minute straight, and let’s just say… it was a sad, clumpy mess. Lesson learned.
2. **Add a little oil.** This is my grandma’s trick for silky chocolate. Just a teaspoon of vegetable or coconut oil helps the chocolate melt smoothly and gives it that beautiful shine. It’s like magic.
3. **Let the cookies cool slightly.** If you try to attach the pretzel legs too soon, the chocolate will slide right off. Give it a minute or two to set up—just enough so it’s tacky but not rock-hard.
And here’s a pro tip: If you’re making these with kids, set up an assembly line. One person melts the chocolate, one dips the cookies, and one sticks in the legs. It’s like a spooky little factory, and it makes the process way more fun.
—
Ingredients
– 12 chocolate sandwich cookies (like Oreos)
– 1 cup chocolate melting wafers or chocolate chips (semi-sweet or milk)
– 1 tsp vegetable or coconut oil (optional, for smoother chocolate)
– 24 pretzel sticks (for legs)
– 24 mini M&Ms or candy eyes (for eyes)
– White chocolate or icing (optional, for extra decoration)
Instructions
1. **Prep your workspace.** Line a baking sheet with parchment paper. This makes cleanup a breeze, and it keeps the cookies from sticking. (I learned this the hard way after scraping melted chocolate off my countertop. *Not* fun.)
2. **Melt the chocolate.** In a microwave-safe bowl, combine the chocolate and oil. Microwave in 15-second bursts, stirring between each, until smooth. Be patient—this part is worth it!
3. **Dip the cookies.** Carefully twist apart each sandwich cookie. Dip the *bottom* half (the side with the cream) into the melted chocolate, coating about halfway. Place it on the parchment paper.
4. **Add the legs.** Break the pretzel sticks in half to make 24 pieces. Stick three pretzel pieces into each side of the chocolate-dipped cookie, angling them out like spider legs. (This is the *best* part—get creative with the angles!)
5. **Attach the eyes.** While the chocolate is still wet, press two mini M&Ms or candy eyes onto the top of the cookie. If you’re feeling fancy, you can use a toothpick to dab a little melted white chocolate for extra detail.
6. **Let them set.** Pop the baking sheet in the fridge for about 10 minutes, or until the chocolate is firm. If you’re in a hurry, the freezer works too—just keep an eye on them so they don’t freeze solid.
7. **Serve and enjoy!** These are best eaten the same day, but they’ll keep in an airtight container for up to 3 days. (Good luck making them last that long, though.)
Notes
– **For gluten-free spiders:** Use gluten-free cookies and pretzels. Easy peasy!
– **For nut allergies:** Double-check that your chocolate and cookies are nut-free. Some brands process in facilities with nuts, so always read the labels.
– **Make it extra spooky:** Use black icing to draw little webs or fangs on the cookies. Or, if you’re *really* ambitious, add a tiny red M&M for a “bloody” effect. (My niece’s personal favorite.)
– Calories: 120
– Fat: 6g
– Carbohydrates: 16g
– Sugar: 10g
– Protein: 1g
—
Beyond the Basics: Creative Twists on Spider Cookies
Once you’ve mastered the classic spider, the sky’s the limit! Here are a few of my favorite variations:
– **Peanut Butter Spiders:** Swap the chocolate sandwich cookies for peanut butter ones. The combo of peanut butter and chocolate is *chef’s kiss*.
– **White Chocolate Ghost Spiders:** Use vanilla sandwich cookies and white chocolate for a ghostly twist. Add mini chocolate chips for eyes and a little black icing for a mouth.
– **Zombie Spiders:** Crush up some red and green candy melts to make “bloody” or “moldy” spiders. (This one’s a hit with older kids who think regular spiders are “too babyish.”)
– **Spider Web Dip:** Okay, this isn’t a cookie, but hear me out. Melt some chocolate in a bowl, then use a toothpick to drag lines from the center outward to make a web. Serve with pretzels, cookies, or fruit for dipping. It’s a *huge* hit at parties.
—
Final Thoughts: Why These Spiders Belong in Your Halloween Lineup
You might also enjoy our Green Goddess Salad Magic: 15-Minute Crunchy Bowl.
For more culinary inspiration, visit AllRecipes.

HomeCook Legacy Kitchen is the editorial name of homecooklegacy.com. Recipes on this site are drafted with the help of AI tools and published by the HomeCook Legacy team. Please check ingredients, cooking times and food-safety guidance for your own situation.