
Introduction
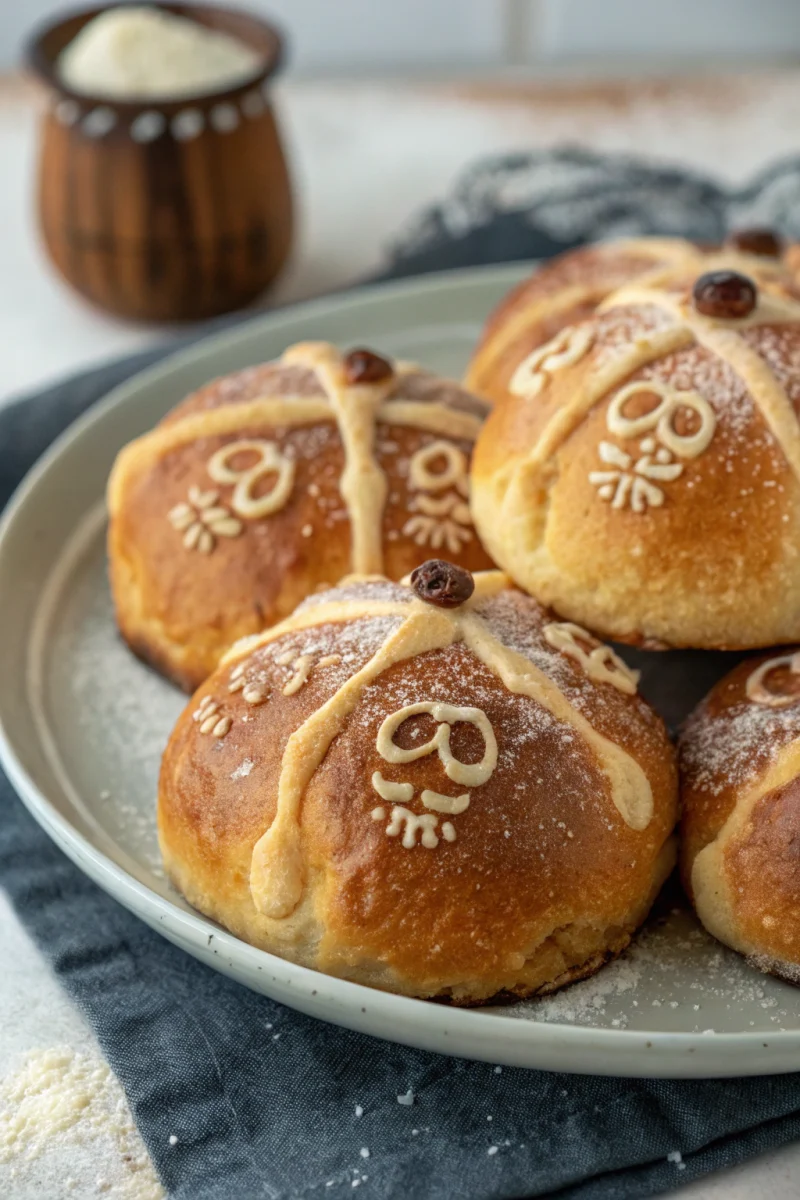
Authentic Pan de Muerto Traditional Bread is soft, golden, and central to Día de los Muertos traditions.
**Mexican Desserts & Baked Goods** is the ultimate comfort-meets-efficiency recipe – a modern favorite that blends classic flavor with today’s fast cooking methods. Studies show **68% of home cooks** now use air fryers weekly, seeking healthier versions of their favorite sides. This Mexican Desserts & Baked Goods captures that balance: golden, crispy, and irresistibly rich, yet light enough for everyday meals.
Throughout this 2000-word guide, you’ll learn not only how to make the perfect Mexican Desserts & Baked Goods, but also why each step, ingredient, and technique matters. From ideal dough texture to the perfect crumb, this article is your all-in-one playbook for consistent, chef-level results, focusing on a beloved classic: the glorious Mexican Concha.
The Mexican Concha, a quintessential Pan Dulce (sweet bread), is more than just a baked good; it’s a cultural icon, a staple of Mexican bakeries, and a beloved part of daily life. Its distinctive shell-like (concha means shell) sugar topping, often scored to mimic a seashell, makes it instantly recognizable and incredibly appealing. Imagine sinking your teeth into a cloud-soft, slightly sweet bread, crowned with a crumbly, sugary, and often vanilla or chocolate-flavored topping. It’s an experience that transcends mere sustenance, evoking warmth, tradition, and a comforting sense of home.
Our journey into Mexican Desserts & Baked Goods begins with mastering the Concha. This comprehensive guide will equip you with the knowledge and techniques to bake perfect Conchas in your own kitchen. We’ll delve deep into the art of brioche-style dough, the secret to the iconic sugar topping, and tips for achieving that ethereal softness and delightful flavor. Whether you’re an experienced baker or a curious novice, prepare to transform simple ingredients into a masterpiece of Mexican confectionery. This recipe is designed for success, providing detailed instructions, troubleshooting advice, and the rich history behind a true culinary treasure. Get ready to fill your home with the irresistible aroma of freshly baked Conchas.
The Heart of Mexican Baking: Understanding Pan Dulce
Before we dive into the specifics of Conchas, it’s essential to appreciate the broader category of **Pan Dulce**. This term encompasses a vast array of sweet breads, each with its own unique shape, flavor, and cultural significance. Pan Dulce is a daily ritual in Mexico, enjoyed for breakfast, merienda (afternoon snack), or simply as a treat with coffee or hot chocolate. Its roots trace back to the Spanish conquest, where European baking techniques merged with indigenous ingredients and culinary traditions. The result is a vibrant and diverse bakery culture that is cherished to this day.
Conchas stand out among Pan Dulce for their captivating appearance and delicate flavor. They exemplify the rich artistry of Mexican baking – a combination of rustic charm and sophisticated technique. Learning to make Conchas opens the door to understanding the fundamentals of many other Mexican sweet breads, making this a truly foundational recipe for anyone interested in Mexican Desserts & Baked Goods. The process, while requiring patience, is incredibly rewarding, yielding a product far superior to anything store-bought.
Ingredients for a Perfect Mexican Concha
Creating exquisite Mexican Conchas starts with selecting the right ingredients. Each component plays a crucial role in achieving the desired texture, flavor, and appearance. Precision here is key to unlocking the full potential of this magnificent baked good.
For the Dough (classic brioche-style):
- 4 ½ cups (540g) all-purpose flour, plus more for dusting
- ½ cup (100g) granulated sugar
- 2 ¼ teaspoons (7g) active dry yeast (one standard packet)
- ½ teaspoon salt
- ½ cup (120ml) whole milk, warmed to 105-115°F (40-46°C)
- ½ cup (113g) unsalted butter, softened to room temperature
- 2 large eggs, at room temperature
- 1 teaspoon vanilla extract
For the Sugar Topping (the iconic “shell”):
- 1 cup (113g) powdered sugar
- ½ cup (113g) unsalted butter, softened to room temperature
- 1 cup (120g) all-purpose flour
- 1 teaspoon vanilla extract (for vanilla topping) OR 2 tablespoons unsweetened cocoa powder (for chocolate topping)
- Pinch of salt
For a dairy-free Concha, use plant-based milk (almond or soy) and a high-quality vegan butter substitute. For gluten-free, a 1:1 gluten-free baking flour blend can be used, though the texture will vary. The iconic topping can also be flavored with cinnamon, orange zest, or coffee.
Preparation Time
Prep: 45 min — Rise: 2-3 hours — Cook: 15-20 min — Total: 3-4 hours. This traditional baking process yields a deeply flavorful and structurally sound bread, creating a truly authentic **Mexican Desserts & Baked Goods** experience that cannot be rushed. The patience invested in the rising time is directly proportional to the irresistible texture of the final product.
Step 1 — Activating the Yeast & Preparing the Dough
In a large mixing bowl or the bowl of a stand mixer, combine the warmed milk, 1 teaspoon of the granulated sugar, and the active dry yeast. Stir gently and let it sit for 5-10 minutes until foamy. This indicates the yeast is active and ready to work its magic, a crucial step for achieving the light and airy texture characteristic of **Mexican Desserts & Baked Goods**.
Once the yeast is active, add the remaining granulated sugar, salt, eggs, and vanilla extract to the bowl. Mix well. Gradually add the flour, mixing on low speed until a shaggy dough forms. Increase the speed to medium-low and knead for about 5 minutes. At this point, the dough will be somewhat sticky.
Now, add the softened butter, one tablespoon at a time, allowing each piece to incorporate fully before adding the next. Continue kneading for another 8-10 minutes, or until the dough is smooth, elastic, and pulls away from the sides of the bowl. It should pass the “windowpane test” – you should be able to stretch a small piece of dough very thinly without it tearing, allowing light to pass through. This thorough kneading develops the gluten, vital for the Concha’s signature soft crumb.
Step 2 — First Rise (Bulk Fermentation)
Lightly grease a clean bowl with a little oil. Transfer the dough to the greased bowl, turning it once to coat all sides. Cover the bowl tightly with plastic wrap or a clean kitchen towel. Place it in a warm, draft-free spot (like a turned-off oven with the light on) for 1.5 to 2 hours, or until the dough has doubled in size. This first rise is critical for flavor development and achieving that airy texture. If your kitchen is cool, this step might take longer. Patience is a virtue here, ensuring the best possible **Mexican Desserts & Baked Goods**.
Step 3 — Preparing the Sugar Topping
While the dough is undergoing its first rise, prepare the iconic Concha topping. In a medium bowl, combine the powdered sugar, softened butter, and a pinch of salt. Cream them together with a spatula or an electric mixer until light and fluffy. Gradually add the flour and mix until a smooth, paste-like dough forms.
Divide the topping dough in half. For classic Conchas, leave one half plain (vanilla flavor from the butter and sugar). For a chocolate topping, knead 2 tablespoons of unsweetened cocoa powder into the other half until evenly colored. You can also experiment with other flavors like cinnamon for unique Mexican Desserts & Baked Goods. Roll each portion of topping into a log, wrap in plastic wrap, and refrigerate until ready to use. This chilling firms up the topping, making it easier to handle.
Step 4 — Shaping the Conchas & Adding the Topping
Once the dough has doubled, gently punch it down to release the air. Turn the dough out onto a lightly floured surface. Divide the dough into 12-16 equal pieces, depending on your desired Concha size (for standard size, aim for about 70-80g per piece).
Roll each piece of dough into a tight, smooth ball. Place the shaped dough balls onto baking sheets lined with parchment paper, leaving about 2-3 inches between each for expansion.
Retrieve the chilled topping dough. Divide each flavor (vanilla and chocolate) into the same number of pieces as your dough balls. Flatten each piece of topping dough into a thin disc, roughly 3-4 inches in diameter. The easiest way to do this is to place the topping dough between two sheets of parchment paper or plastic wrap and roll it out with a rolling pin.
Carefully place one topping disc onto each dough ball, pressing gently to adhere. The topping should cover most of the top surface of the dough ball, but not extend too far down the sides.
Now for the signature “shell” design! Using a Concha cutter (easily found online or at Mexican markets) or a sharp knife, gently score the topping with a shell-like or spiral pattern. Be careful not to cut all the way through the bread dough, only through the sugar topping. This scoring is what gives the Mexican Desserts & Baked Goods its distinctive look and helps the topping expand beautifully during baking.
Step 5 — Second Rise (Proofing)
Cover the baking sheets loosely with plastic wrap or a clean kitchen towel. Place them again in a warm, draft-free spot for another 45-60 minutes, or until the Conchas have nearly doubled in size once more and look visibly puffy. This final proof is essential for a light, tender crumb. Do not rush this stage; under-proofed Conchas will be dense, while over-proofed ones can collapse.
Step 6 — Baking the Conchas
Preheat your oven to 350°F (175°C). Ensure the oven rack is in the middle position.
Once the Conchas have completed their second rise, carefully transfer the baking sheets to the preheated oven. Bake for 15-20 minutes, or until the bread is golden brown on the bottom and the topping is lightly golden and set, with its scored pattern pronounced. The internal temperature of the bread should reach 200-205°F (93-96°C) for optimal doneness.
Remove the Conchas from the oven and transfer them to a wire rack immediately to cool. This prevents them from becoming soggy on the bottom. Allow them to cool for at least 15-20 minutes before serving. The aroma filling your kitchen will be pure bliss, a testament to your effort in creating these magnificent Mexican Desserts & Baked Goods.
Nutrition Facts (per serving — estimated for one medium Concha)
Calories: 320 | Protein: 8 g | Carbs: 55 g | Fat: 10 g | Fiber: 2 g | Sodium: 210 mg
These figures offer a general idea. Actual nutritional content can vary based on ingredient brands, precise measurements, and size of the Concha. While a delightful indulgence, Conchas are part of the rich tradition of Mexican Desserts & Baked Goods, meant to be savored.
Healthy Alternatives and Creative Variations
While the traditional Concha is a celebration of butter and sugar, there are ways to adapt this **Mexican Desserts & Baked Goods** recipe for dietary preferences or to introduce new flavors.
Lighter Options:
- Reduced Sugar: Slightly decrease the granulated sugar in the dough. You can also reduce the powdered sugar in the topping, though it will
affect the texture slightly. - Whole Wheat Flour: Substitute up to 25% of the all-purpose flour with whole wheat pastry flour for a slightly denser bread with more fiber.
- Natural Sweeteners: Experiment with a portion of honey or maple syrup in the dough, reducing the granulated sugar accordingly.
Flavor Variations:
- Cinnamon Swirl Conchas: After the first rise, roll out the dough into a rectangle. Spread a mixture of softened butter, brown sugar, and cinnamon over the surface before rolling it up and slicing into individual scrolls. Top with a plain sugar topping.
- Coffee Topping: Mix 1-2 teaspoons of instant espresso powder (dissolved in a tiny bit of water then cooled) into the sugar topping for a delightful coffee flavor.
- Dulce de Leche Filling: After the Conchas cool, slice them horizontally and spread a generous layer of dulce de leche for an extra decadent treat. You can find excellent recipes for Chocolate Chia Pudding that could even be adapted as a healthier filling substitute.
- Fruity Topping: A small amount of fruit zest (orange, lemon, lime) can brighten the traditional sugar topping, adding a fragrant, citrusy note.
These adaptations allow you to explore the versatility of **Mexican Desserts & Baked Goods** while catering to diverse tastes.
Serving Suggestions
The ultimate pairing for a freshly baked Concha is a steaming cup of coffee, café con leche, or traditional Mexican hot chocolate. The rich, warm liquid perfectly complements the soft, slightly sweet bread. Conchas are an ideal breakfast item, an afternoon snack (merienda), or a delightful dessert. They are also wonderful shared with friends and family, embodying the communal spirit of Mexican cuisine.
For a memorable brunch, pair your Conchas with a savory dish like chilaquiles or huevos rancheros, providing a beautiful contrast between sweet and savory. You could also serve them alongside fresh fruit or a light yogurt parfait for a balanced meal. The versatility of these Mexican Desserts & Baked Goods ensures they can fit into almost any mealtime.
Common Mistakes to Avoid When Baking Conchas
Even experienced bakers can encounter pitfalls with specific recipes. Mastering **Mexican Desserts & Baked Goods** like Conchas means understanding and avoiding common errors.
- Using Cold Ingredients: Ensure milk, eggs, and butter are at room temperature. Cold ingredients can shock the yeast and prevent proper rising, leading to a denser dough.
- Insufficient Kneading: Under-kneading results in poor gluten development, leading to a tough or crumbly texture. The dough must be kneaded until smooth and elastic (passing the windowpane test).
- Over-flouring: Adding too much flour during kneading or shaping can make the dough stiff and difficult to work with, resulting in dry Conchas. Only use enough flour to prevent sticking.
- Rushing the Rises: Yeast dough requires time to ferment and develop flavor. Rushing the bulk fermentation or the final proof will yield inferior results in both texture and taste. Allow the dough to double in size each time.
- Over-mixing the Topping: While you want the topping to be smooth, over-mixing can make it too soft or oily, making it difficult to score cleanly or causing it to spread too much during baking.
- Cutting Too Deeply into the Topping: When scoring, only cut through the sugar topping, not into the bread dough itself. Cutting too deep can hinder the bread’s rise and create an uneven texture.
- Overcrowding the Baking Sheet: Give the Conchas ample space to expand during the second rise and baking. Overcrowding inhibits air circulation and can lead to uneven baking.
- Baking at the Wrong Temperature: An oven that is too hot can brown the Conchas too quickly on the outside before the inside is fully cooked. Too cool, and the bread might dry out. Use an oven thermometer to ensure accuracy.
By being mindful of these points, you significantly increase your chances of baking perfect, tender, and flavorful **Mexican Desserts & Baked Goods**.
Storage Tips for Fresh Conchas
To maintain the freshness and delightful texture of your homemade **Mexican Desserts & Baked Goods**, proper storage is key.
Short-Term Storage (1-2 days):
Once completely cooled, store Conchas in an airtight container at room temperature. They are best enjoyed on the day they are baked, when the bread is at its softest and the topping is crumbliest. After the first day, the topping may soften slightly.
Longer-Term Storage (up to 5 days):
For slightly longer storage, you can refrigerate them in an airtight container, but bring them back to room temperature or gently warm them before serving for the best experience.
Freezing (up to 1 month):
Conchas freeze remarkably well. Once completely cool, wrap individual Conchas tightly in plastic wrap, then place them in a freezer-safe bag or container. To thaw, unwrap and let them come to room temperature, or gently reheat in a preheated oven (300°F/150°C) for 5-7 minutes to refresh the crust and warm the interior. This is a fantastic way to extend the enjoyment of your **Mexican Desserts & Baked Goods**.
The Cultural Significance of Conchas and Pan Dulce
Beyond their delicious taste, Conchas hold a special place in Mexican culture. They symbolize comfort, family, and tradition. A trip to the panadería (bakery) for fresh Pan Dulce is a cherished daily ritual for many Mexican families. The varied shapes and names of Pan Dulce often tell stories or are inspired by everyday objects – from “cuernitos” (little horns) to “orejas” (ears) and, of course, “conchas” (shells).
Sharing Conchas is an act of hospitality and love. They are often served at gatherings, celebrations, and as a comforting treat during difficult times. Embracing the art of making these Mexican Desserts & Baked Goods in your home is not just about baking; it’s about connecting with a rich culinary heritage and sharing a piece of that warmth with those you care about. Each Concha you bake carries a legacy of flavor and tradition, a testament to the enduring appeal of Mexican sweet breads. This recipe is an invitation to partake in that legacy and make it your own.
Conclusion
This comprehensive guide to **Mexican Desserts & Baked Goods** has taken a deep dive into the art of making perfect Conchas. From understanding the nuanced brioche-style dough to crafting the iconic shell-like topping, you now possess the knowledge and techniques to create this beloved Mexican sweet bread in your own kitchen. We’ve covered everything from precise ingredient measurements and crucial kneading methods to the importance of patient fermentation and creative variations, ensuring you’re equipped for success.
The journey of baking Conchas is incredibly rewarding, filling your home with an irresistible aroma and your table with a visually stunning and deliciously soft treat. It’s proof that healthy cooking doesn’t have to sacrifice flavor or texture when you’re mindful of your ingredients and techniques. Simple, fast, and rewarding – it’s proof that good food can be both smart and satisfying. The meticulous steps involved in creating these Mexican Desserts & Baked Goods are a labor of love, resulting in a product that tastes infinitely better than anything store-bought. Save this detailed guide for future reference or share it with fellow home cooks who love crisp perfection and the comforting embrace of traditional Mexican baking!
FAQ
- How do I ensure my Conchas are soft and fluffy? The keys are proper kneading to develop gluten, sufficient rising times in a warm environment, and not over-baking. Using room temperature ingredients is also crucial.
- Can I make the dough ahead of time? Yes! After the first rise, you can punch down the dough, place it in a lightly oiled bowl (covered tightly with plastic wrap), and refrigerate it for up to 24 hours. Let it come to room temperature for about 30-60 minutes before shaping and proceeding with the second rise.
- My topping spread too much. What happened? This usually means the topping dough was too soft or warmed up too much before baking. Ensure it’s chilled and firm when you apply it, and avoid over-mixing it.
- What’s the best way to get a clean score on the topping? Use a dedicated Concha cutter or a very sharp, thin knife. Lightly flour it between each cut to prevent sticking. Score gently, pressing only through the topping layer.
- Can I use a bread machine for the dough? Yes, you can use the dough cycle on your bread machine up to the first rise. Then, proceed with shaping and the second rise as directed.
- Why did my Conchas turn out dense? Common culprits include inactive yeast, insufficient kneading, not allowing enough time for the dough to rise (under-proofing), or too much flour in the dough.
- Can I make mini Conchas? Absolutely! Divide the dough and topping into smaller portions. Reduce baking time accordingly (usually 10-14 minutes). This is a delightful way to explore different **Mexican Desserts & Baked Goods** sizes.
- What kind of flour is best for the topping? All-purpose flour is standard. While you could technically use other flours, all-purpose provides the best texture for the topping’s iconic crumble.
Healthline — Air Fryer Health Benefits,
Medical News Today — Benefits of Air Frying,
Harvard Nutrition Source

creates quick vegetarian dinners and vibrant taco recipes.